Staff car stories – Aaron bought a 1983 TVR 280i – Part 2
30 September 2022
In our last newsletter, our Car Club Liaison Aaron Prior told us all about his purchase and restoration of a 1983 TVR 280i. Part two of his TVR journey begins with making (more) poor financial decisions, with the TVR project moving from a light restoration to a full body off restoration. Join him as he delves into the magical world of 35-year-old seized bolts, rust and skinned knuckles…
To the shock of no one involved, removing the fibreglass body of a car is cumbersome process, much to the delight of my friends who I had roped in to help. My father and I spent several weeks planning the process and consulted some TVR owners online about their experience removing the body of their cars. Car Clubs and Facebook groups can be invaluable sources of information, so make sure to sign up to any relevant to your classic!
After meticulously undoing all the bolts connecting the car to the chassis and removing the steering column and a few other pieces, we were ready to go. In the end we settled for lifting the rear of the body with an engine crane and lifting the front using four people, whilst one more directed proceedings and another rolled the chassis out from under the body at the appropriate time. Thankfully the process all went without a hitch (mostly).

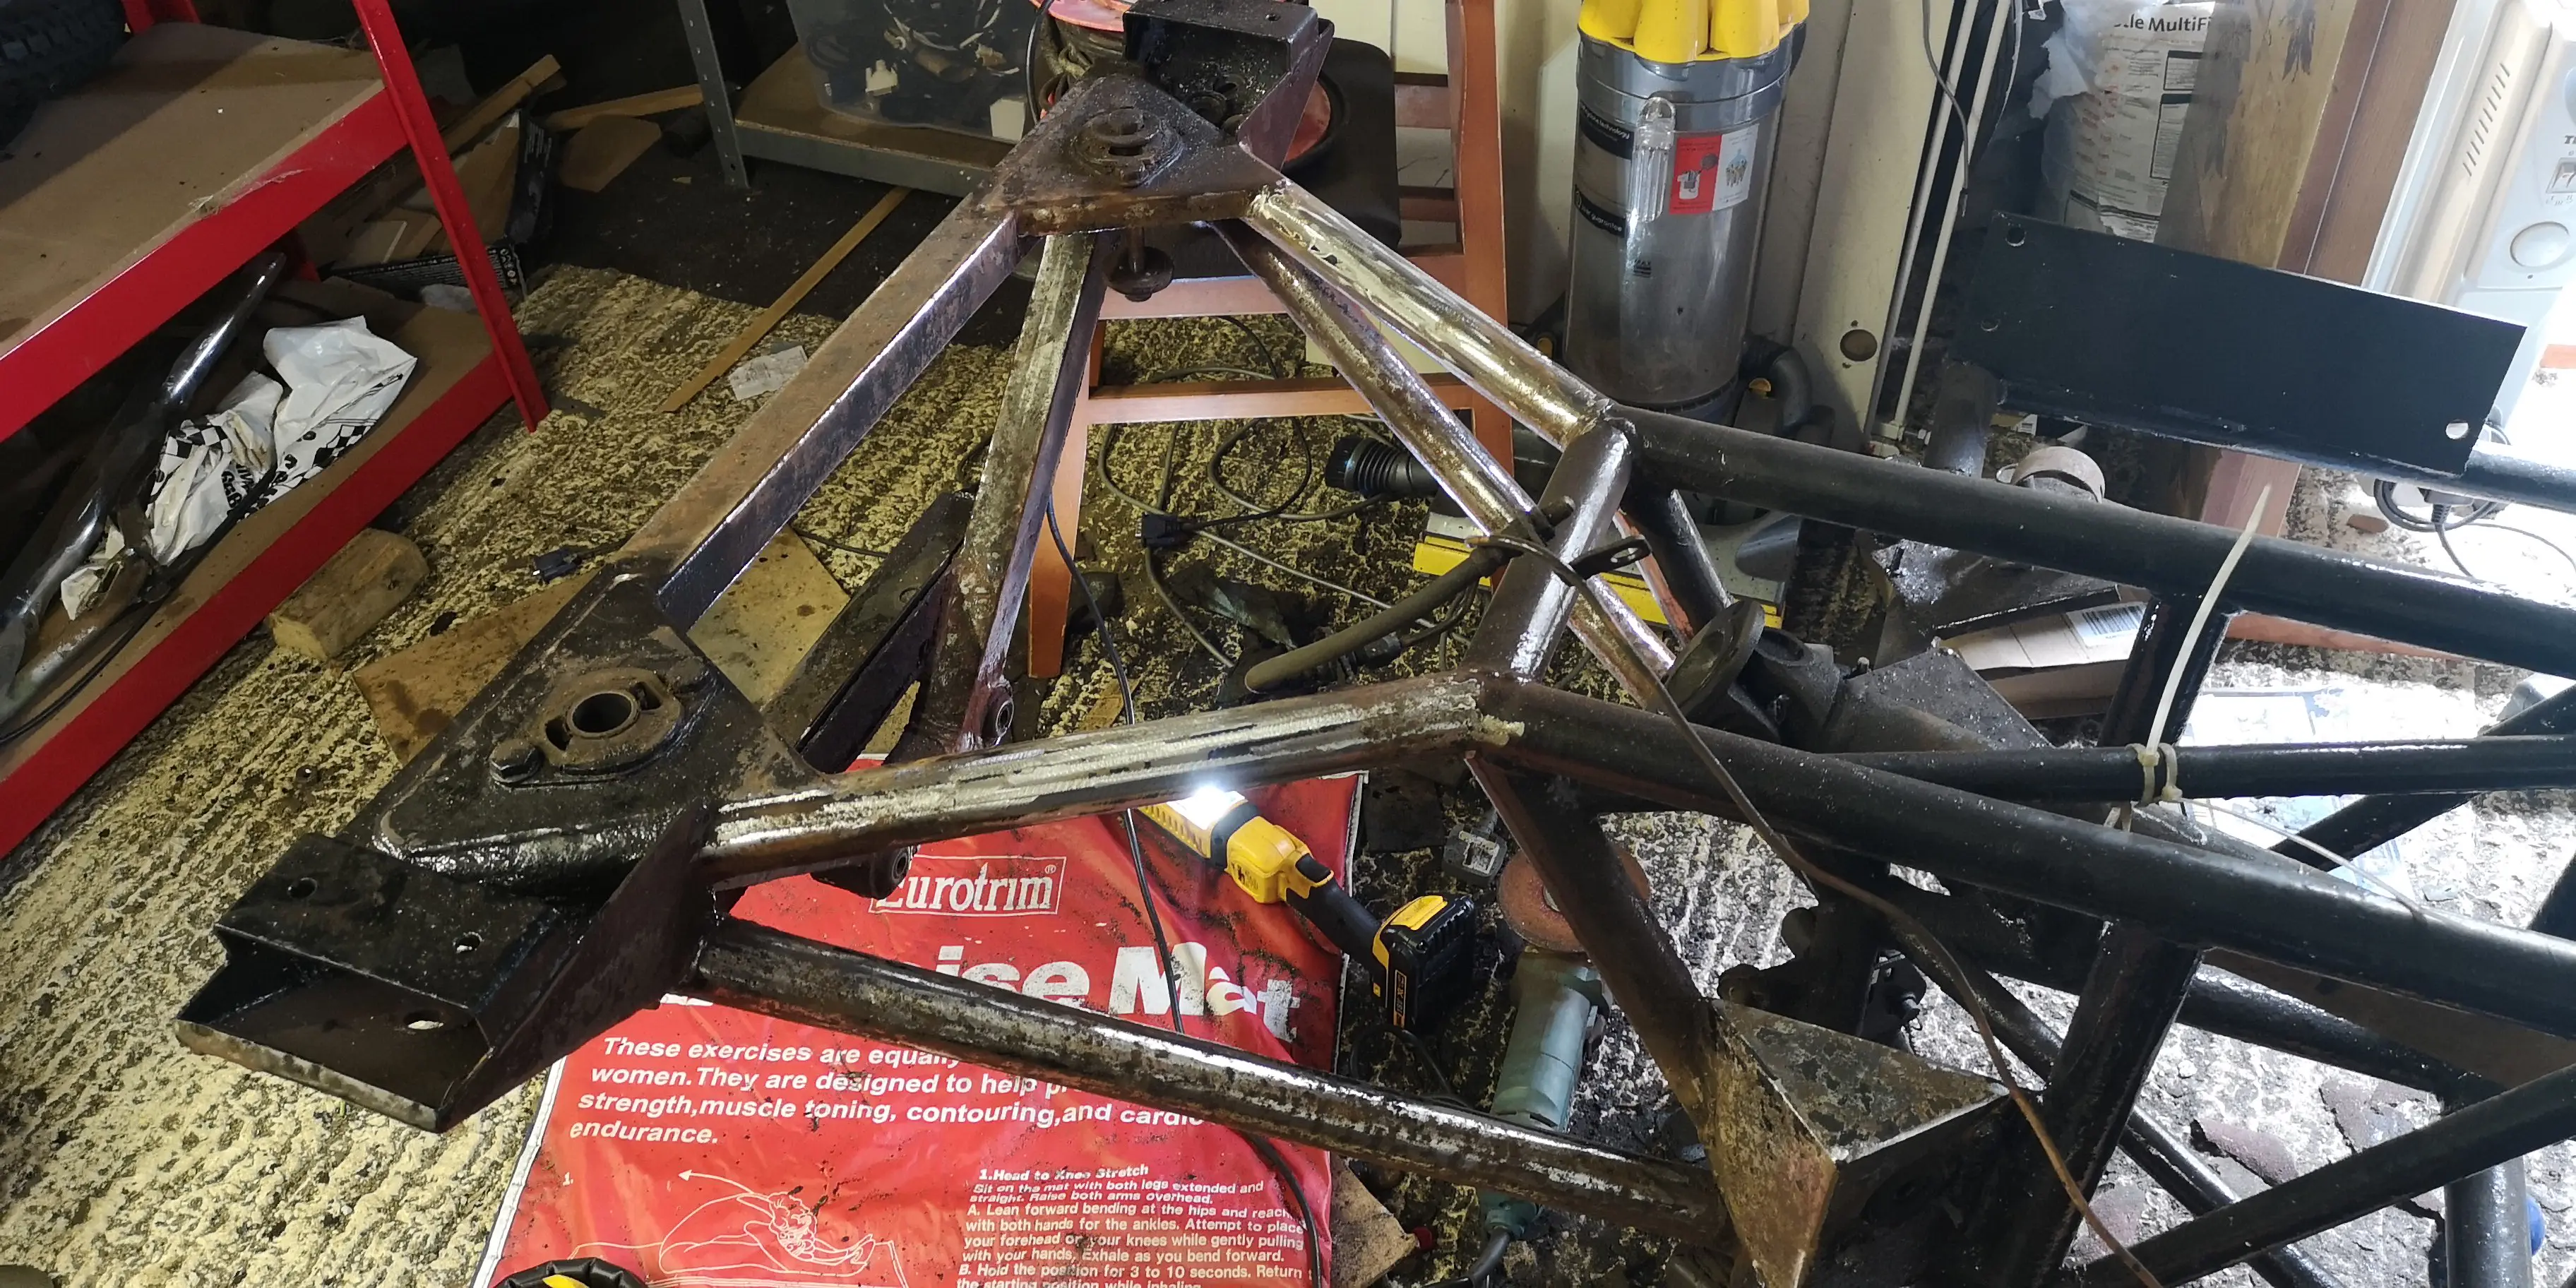
The chassis immediately after being separated from the body. Lots of surface rust and tired parts visible!
With the body off we could inspect the chassis properly and from a structural viewpoint everything checked out, which confirmed our initial assessment of things with the body on. Unfortunately, pretty much everything else was either completely done for or on its way out, and as such a very long path to the completion of the project had been revealed.
The next big hit the project timeline took was due to the need to remove the rear brake callipers, as they were completely seized. The 280i uses a Jaguar rear end and as such has inboard rear brakes, and although cumbersome to work on in-situ, if well maintained it is a good system. However, if it is on a 35-year-old TVR that hasn’t been well maintained problems do occur.
Despite multiple methods of “persuasion” we could not get the very (very) seized calliper mounting bolts to co-operate in-situ. As such we had to go through the lengthy process of removing the differential cradle from the car, and then removing the differential from the cradle to give us enough space to get some more meaty tools involved. Eventually after multiple long afternoons we were able to remove the stubborn callipers and inspect the differential and put a fresh coat of paint on it.
The rear end of the chassis with differential cradle removed. It was being taken back to bare metal at this point.
The next thing up on the list was to sand all the surface rust, oil and old paint on the chassis back to bare metal with a variety of power tools, heavy duty sandpaper and wire brushes. This was not an easy or fun process and due to the arrival of my first child in 2016, it stretched on for far longer (years) than initially envisioned. Eventually the bulk of this work had been completed, and with a fresh coat or two of paint applied, the chassis was looking much better. The time had come to place an order for lots of shiny new things.
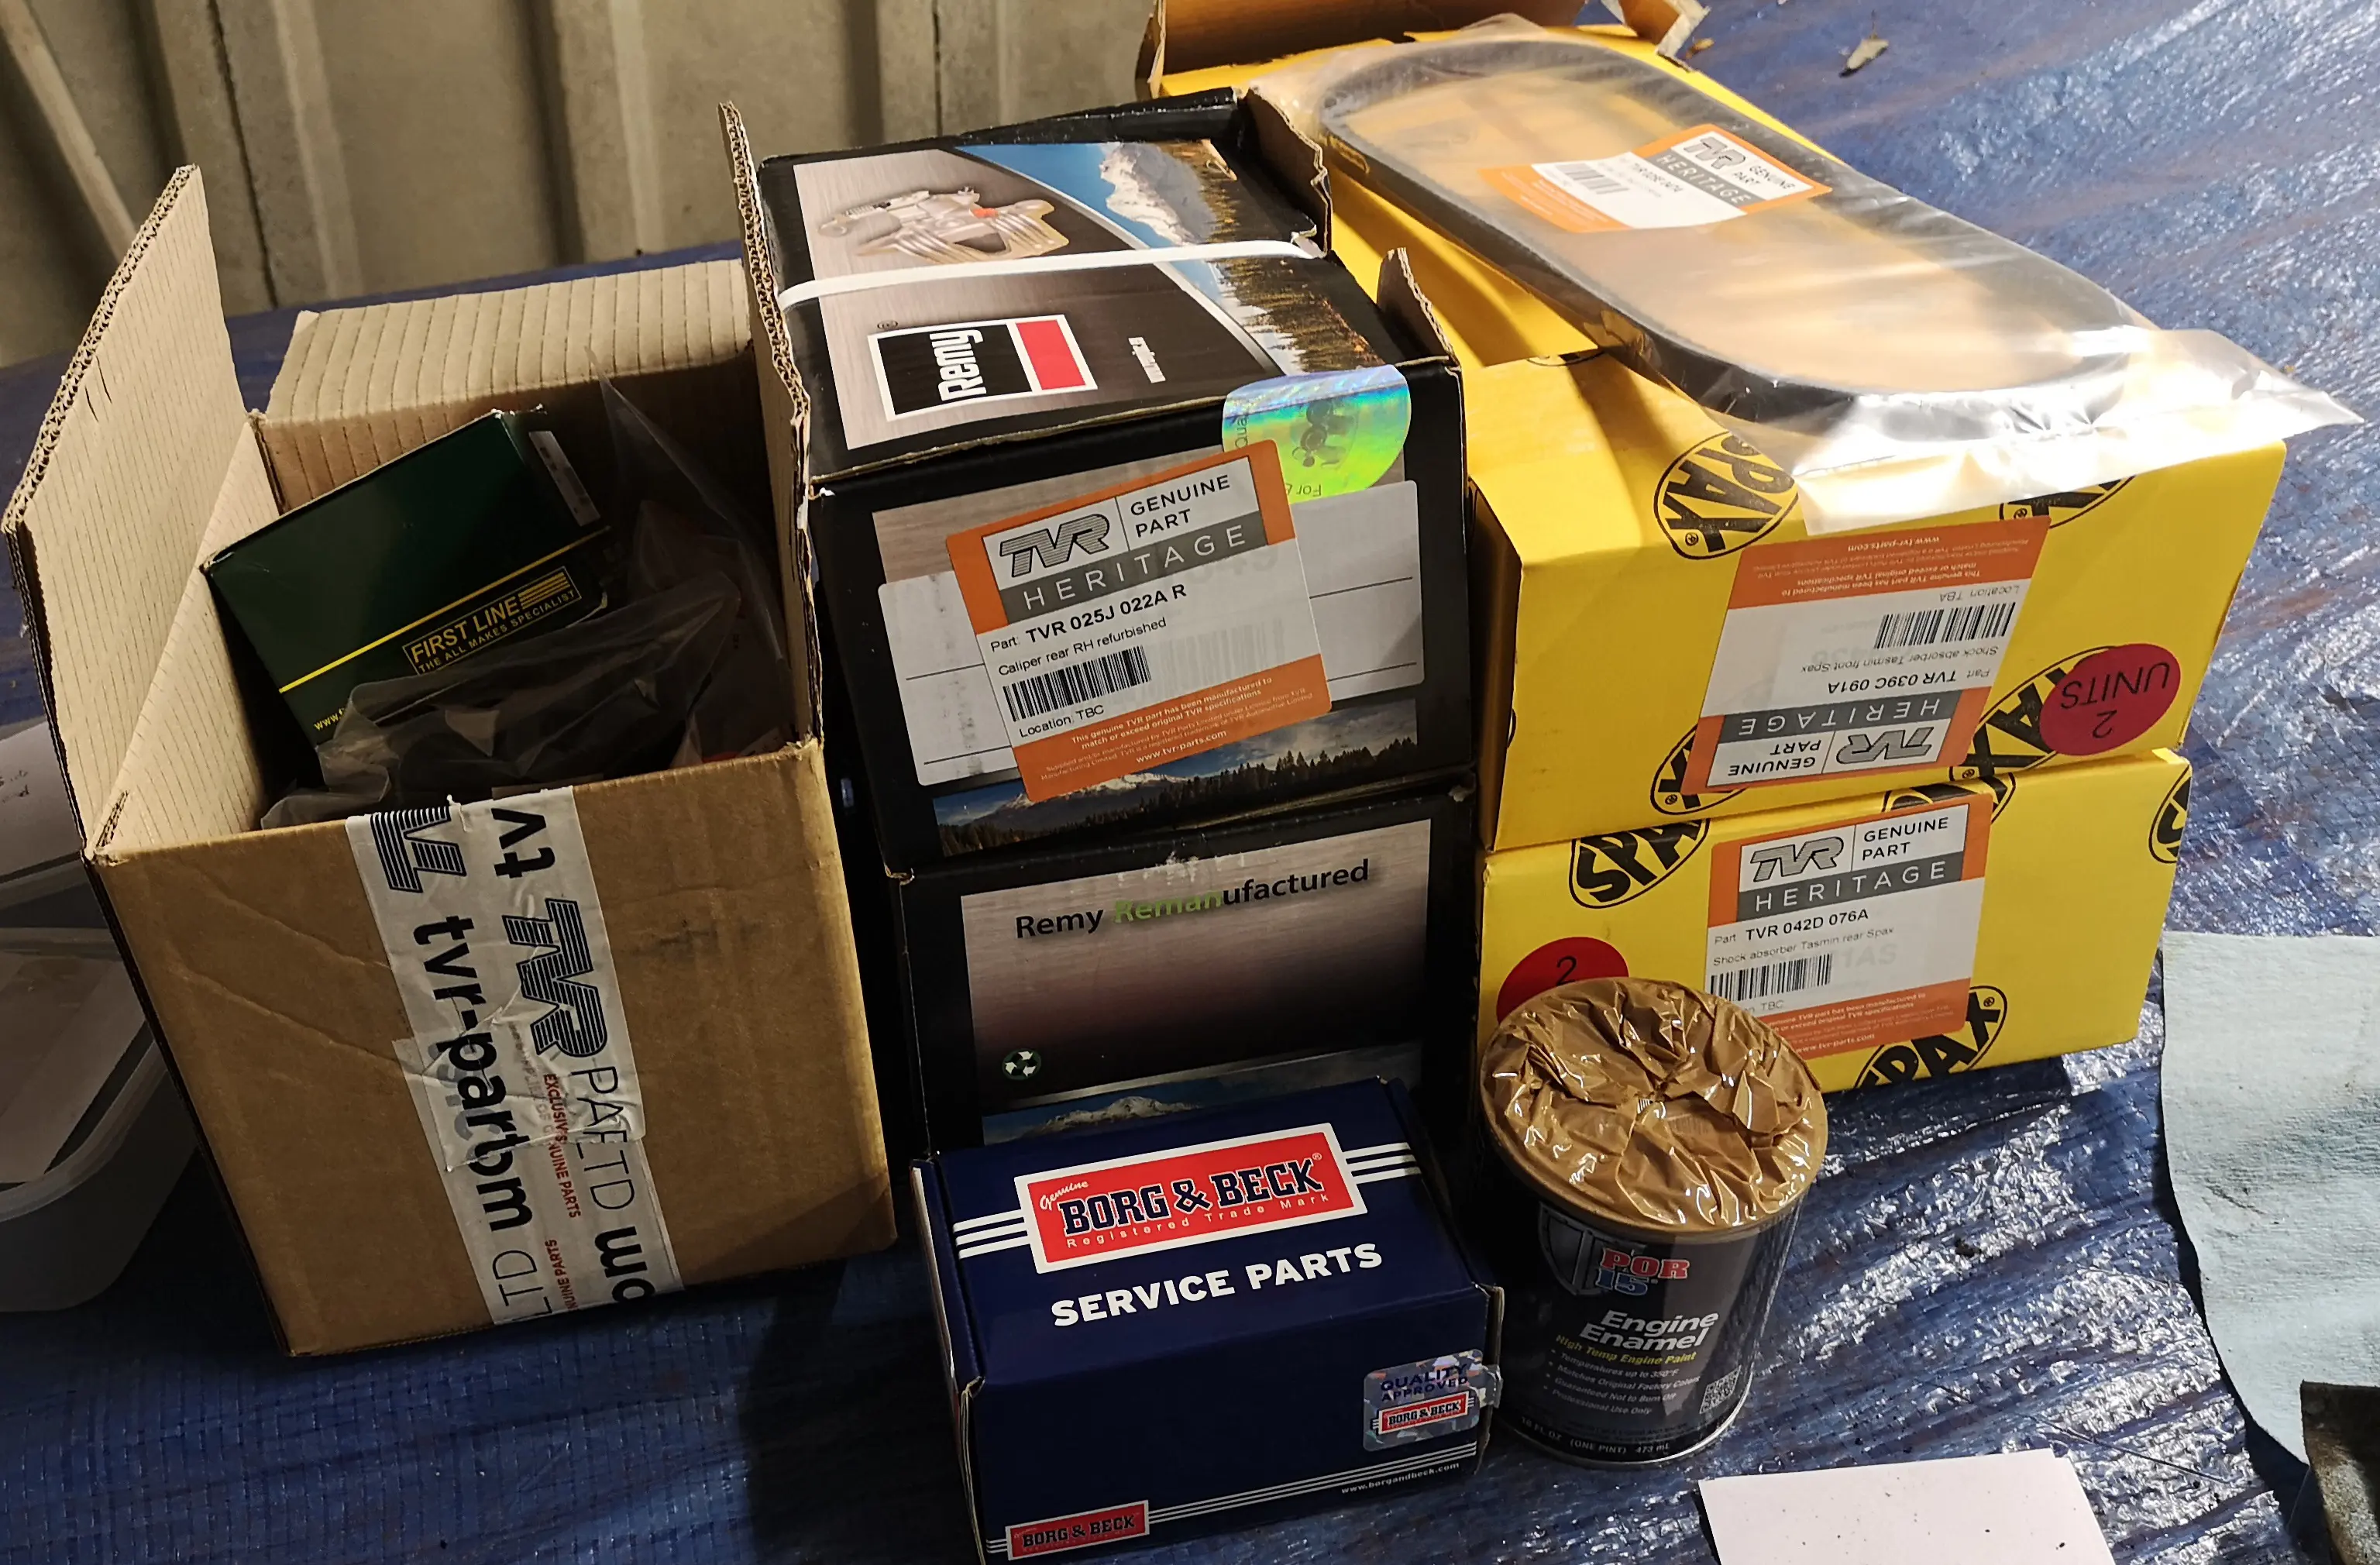
Big pile of shiny new parts – hemorrhaging wallet not pictured.
Once my bank account had been thoroughly assaulted and the order had arrived, we assessed how to go about fitting everything to the chassis. First up was mounting the new brake discs to the differential and then remounting the differential cradle. This was achieved suspiciously quickly and efficiently, as was remounting the driveshafts and suspension arms (after fitting new bushes). The shiny new adjustable rear shocks and re-conditioned springs were also fitted at this point and on the whole things were looking pretty positive.
Next up was removal of the exhaust manifolds. When we had previously got the car running a small flame would occasionally shoot out the side of the engine due to the manifold gaskets having partially disintegrated over time. This definitely needed to be rectified and the manifolds also needed a coat of paint to smarten them up. Unfortunately the last bolt on both sides refused to budge, but with the persuasion of a blowtorch and a large mallet they eventually relented (but not until making me quite literally bleed for it!).
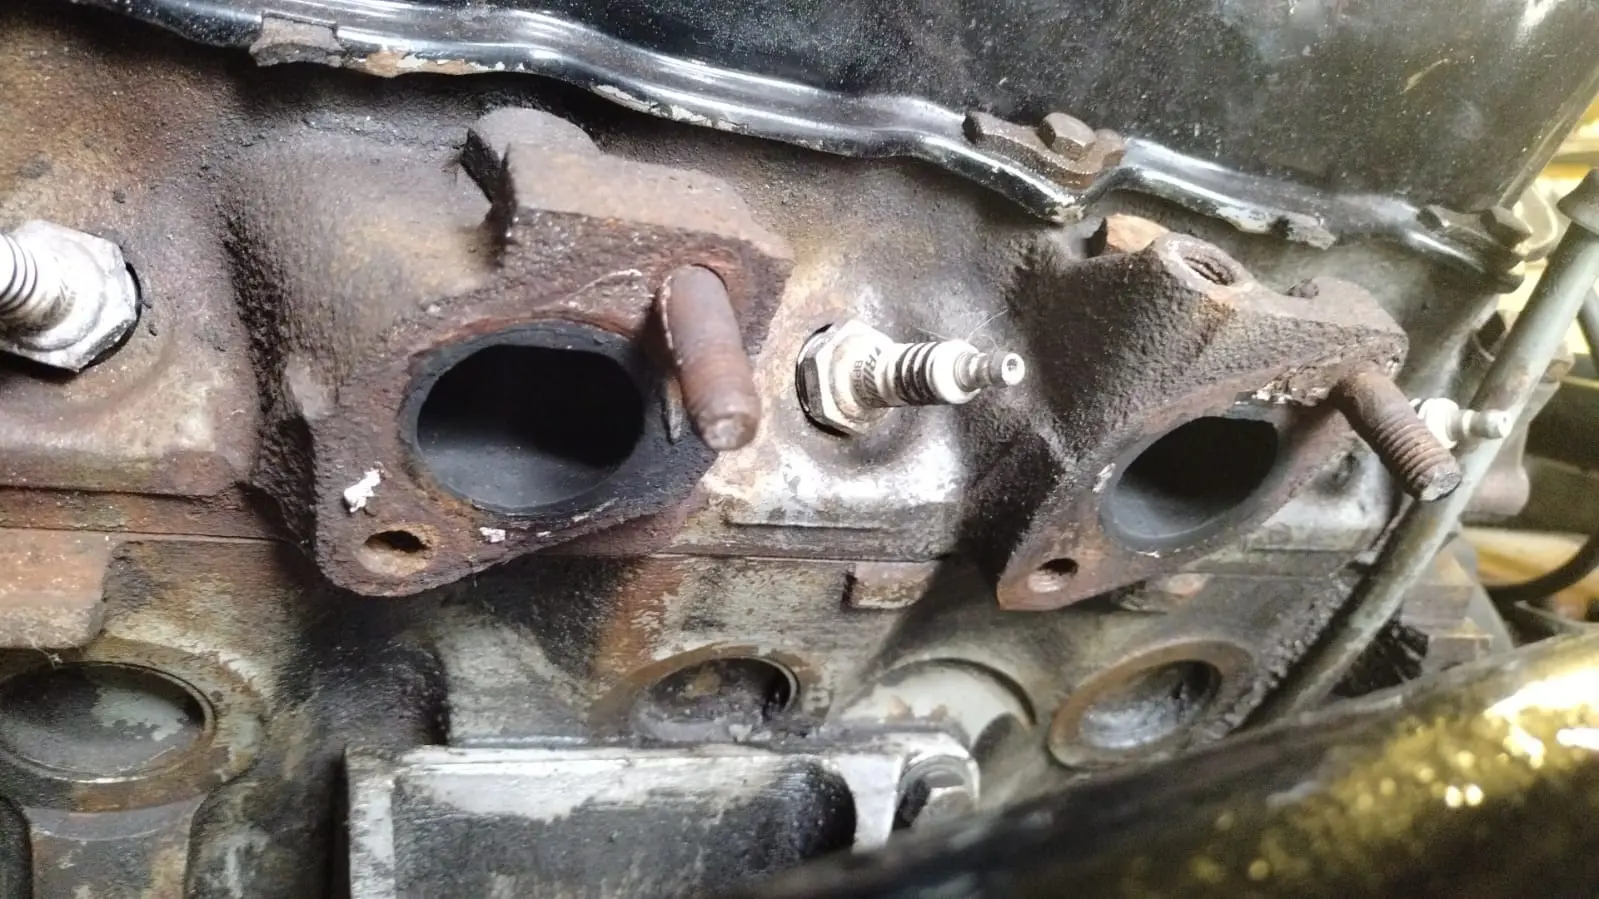
The site of the exhaust manifold battle and much blood loss from my knuckles.
For a variety of reasons work slowed to a complete stop for about a year and a half and didn’t resume in full force until the winter of 2021. The next step was not something we had been looking forward to as it involved compressing the front springs to remove them and then subsequently disassembling the front suspension. In what felt like an act of spite from the car, the front springs refused to compress enough with either set of heavy-duty spring compressors that we had on hand due to a lack of room to manoeuvre the compressors. We had to rig up a makeshift compressor using a length of threaded steel bar and a ½” steel plate with a hole in it. Somewhat typically this £8 solution worked without an issue (unlike the £90 spring compressors!) and we were able to take the front suspension apart.
Over a few weekends the suspension arm bushes were replaced with new ones, new ball joints were fitted and the lower and upper arms were sanded and given a fresh coat of paint. We then reassembled everything and for the first time in 6 years the chassis was lowered to the floor and rolled outside.

A very shiny painted chassis with new bushes, shocks and a multitude of other parts fitted.
For now, this is where the story ends. The chassis is currently sat waiting for me to fit new brake lines and mount the new brake callipers to the front and rear, my bank account sits trembling at the thought of what is left to purchase, and planning is underway for remounting the body to the chassis (a significantly more awkward process compared to removal). After 9 years the end is finally nigh…